STEPS TO SET UP LAN RECEIPT PRINTER
Printer Hardware Setup ( ZyWell ZY608-UST-K)
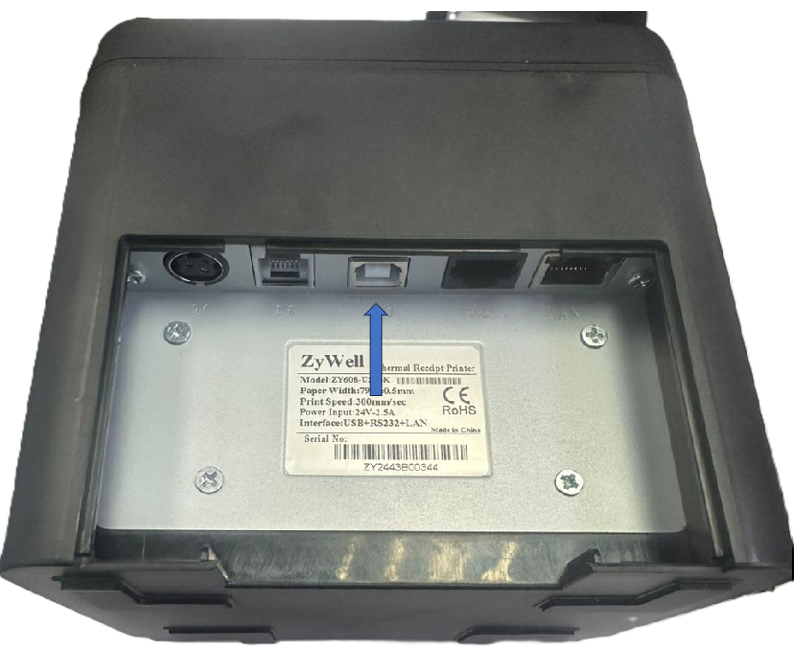
Step1: Plug the ethernet cable into the rightmost port
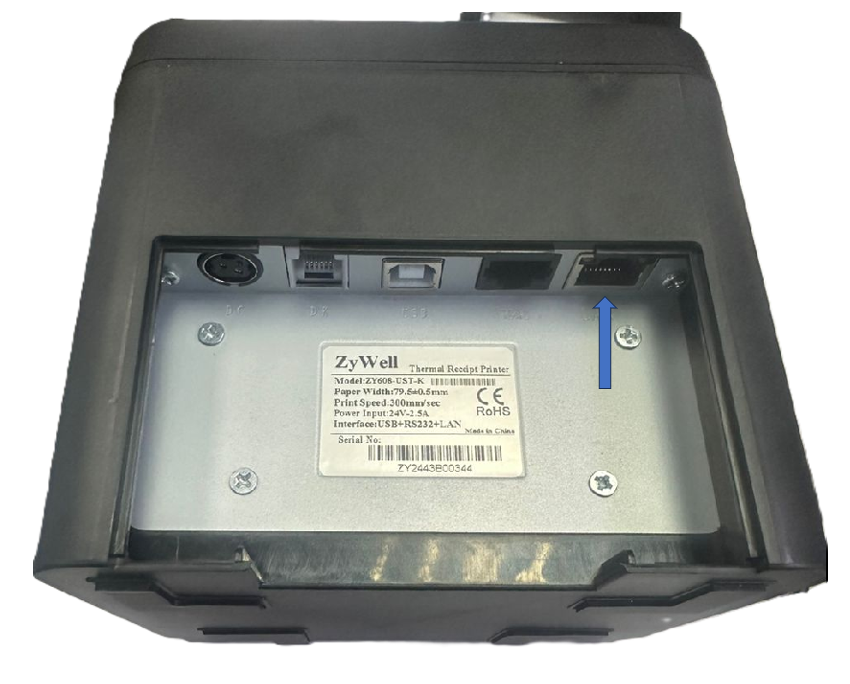
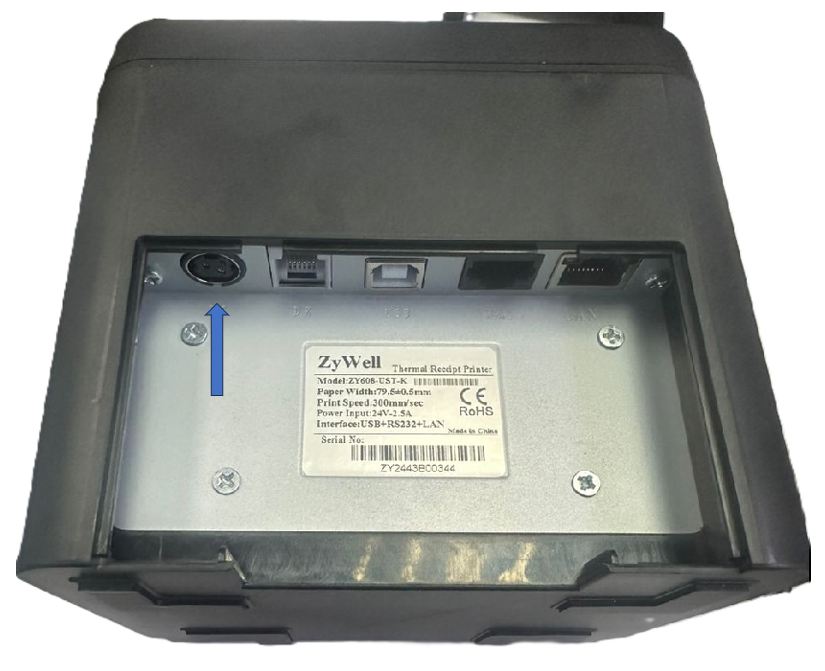
Step2: Plug the power cable into the leftmost port
Step3: Connect the opposite end of the ethernet cable to an open numbered port on the router.
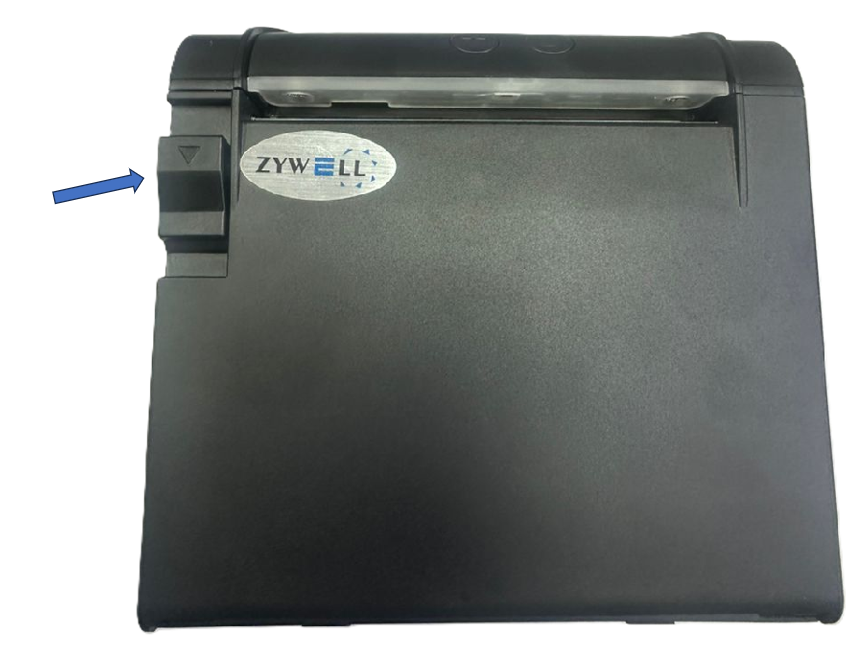
Step4: Push back the lever to open the cover, load the paper, and close the cover on the paper.

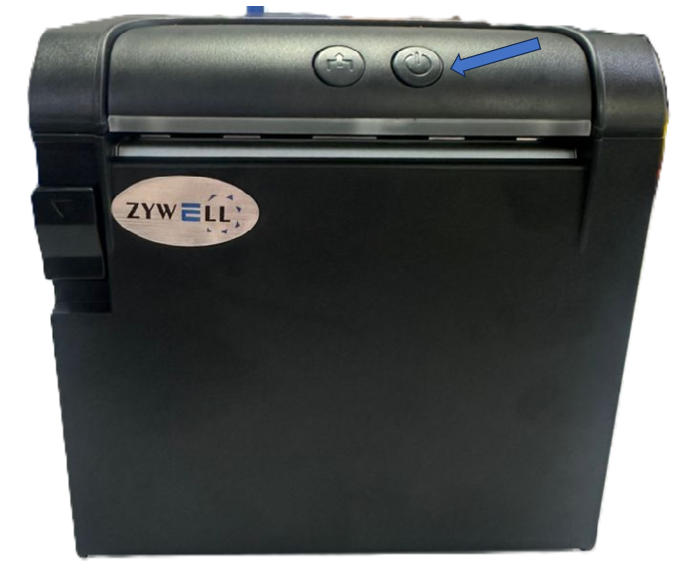
Step5: Press the power button to turn the printer on
Step6: How to set Printer IP?
Plug the USB cable into the middle port and connect to the computer
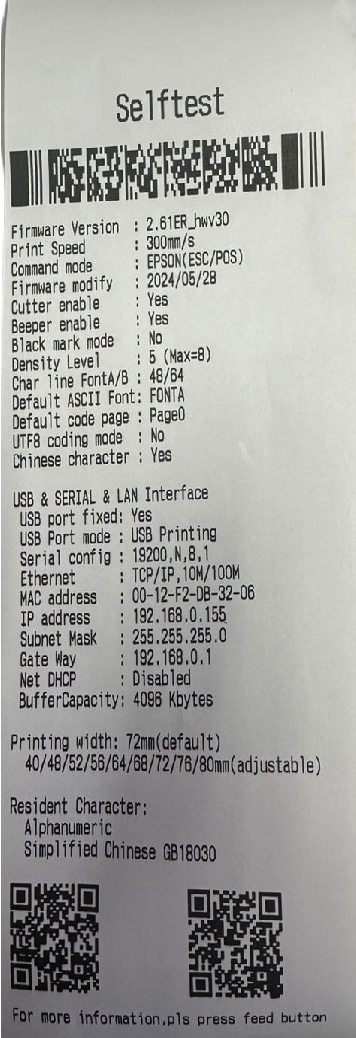
Step7: How to Perform a Self-Test on the printer
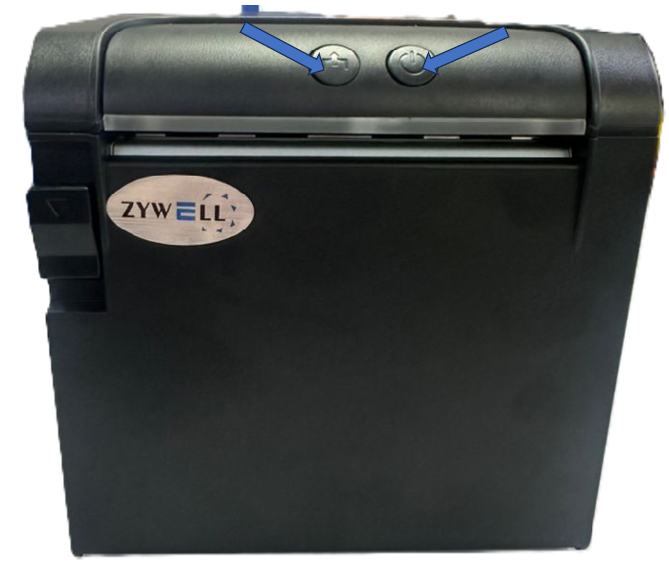
- Press the Power button(right button). then press the Feed button (left button).
- The printer will print a self-test
- Sample
Step8: Open Printer Test V3.30C
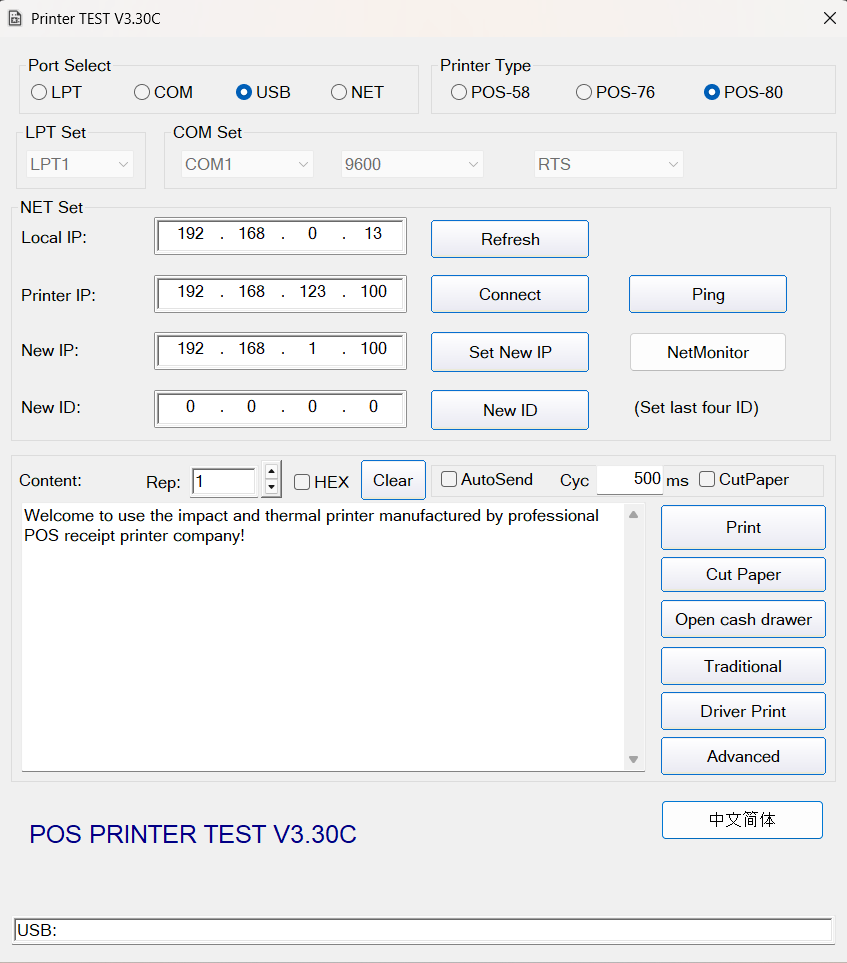
- Under Port Select, choose USB
- Ensure that the printer is physically connected via USB cable to your computer.
- In the "Printer IP" field, enter the current IP address shown on the self-test page.
- In the "New IP" field, enter your desired IP
- Click "Set New IP" to apply the change
Go to www.popcorncashier.com
Go to Management > Invoice Setting > Printer:
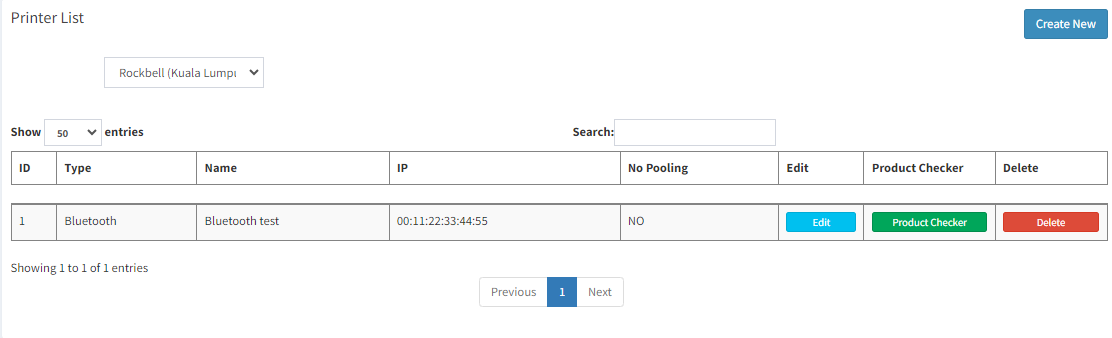
- Locate the "Create New" button on the top right corner.
- Click on it to open the New Printer Setup form.
Create LAN Printer (LAN Printer must be linked with LAN Cable):
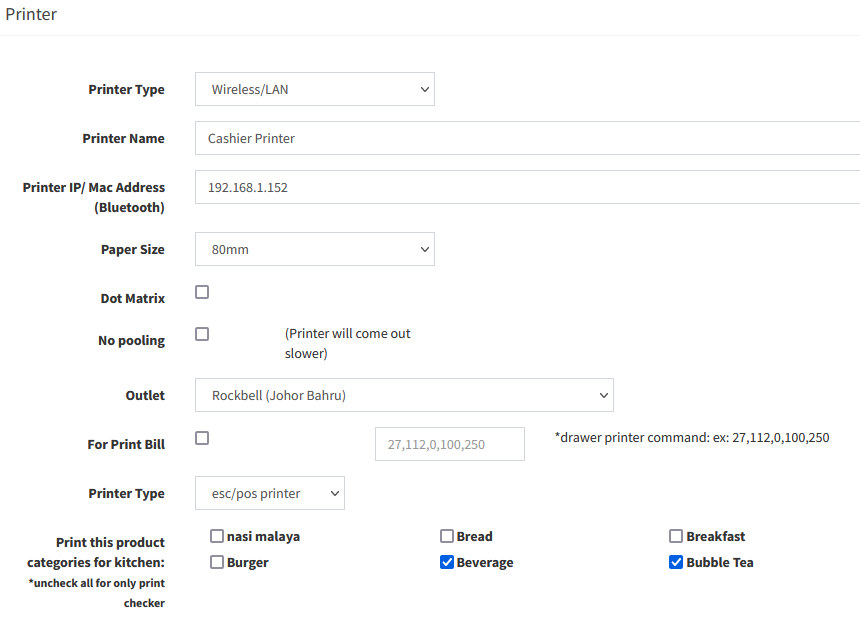
- Printer Type: Select Wireless/LAN
- Printer Name: e.g. Cashier Printer/Kitchen Printer/Bar Printer
- Printer IP: Print out the Self-Test from Printer, and key in the IP address to this column
*This step might need to assign a IP address to Printer (Printer Configuration) - Paper Size: Receipt Paper Size (58mm/80mm)
- Outlet: Select outlet for this printer
- For Print Bill: Tick this function to print out the receipt (Normally for Cashier Printer)
- Printer Type: For Normal Thermal Receipt Printer, please select esc/pos printer. For Sticker Label Printer, please select sticker printer
- Print this product categories for kitchen: For Kitchen Checker Use
How to check printer connection status in Popcorn Pos Cashier?
Go to Popcorn Cashier App:
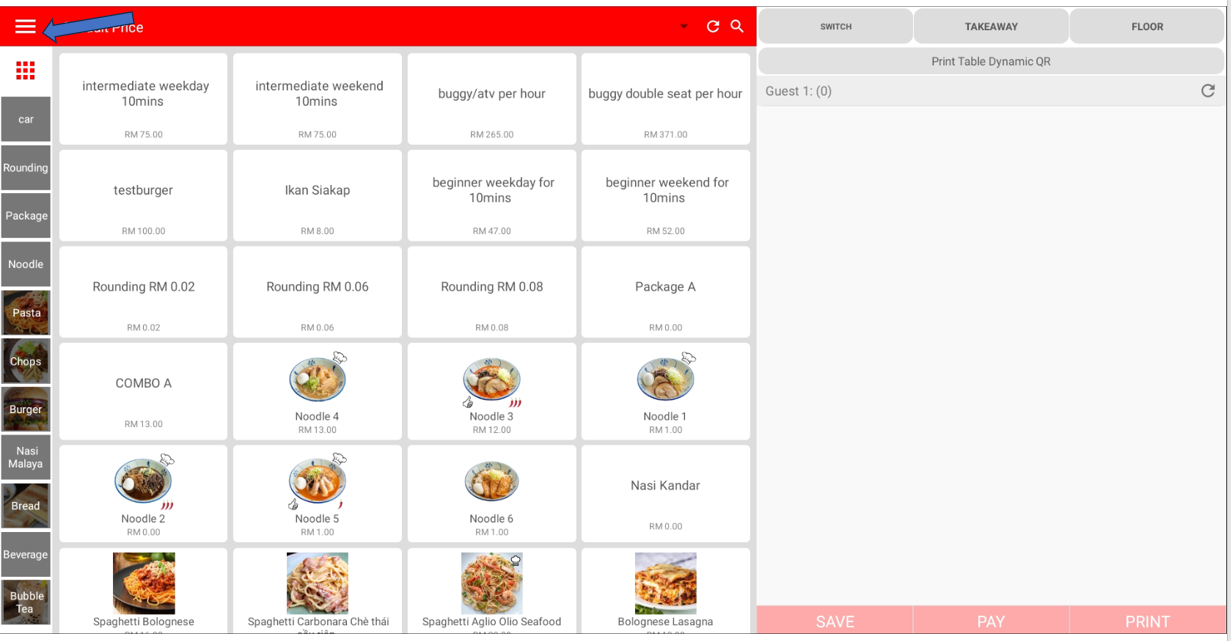
- Locate the three horizontal lines (☰) at the top left corner of the screen.
- Click on it to open the menu options.
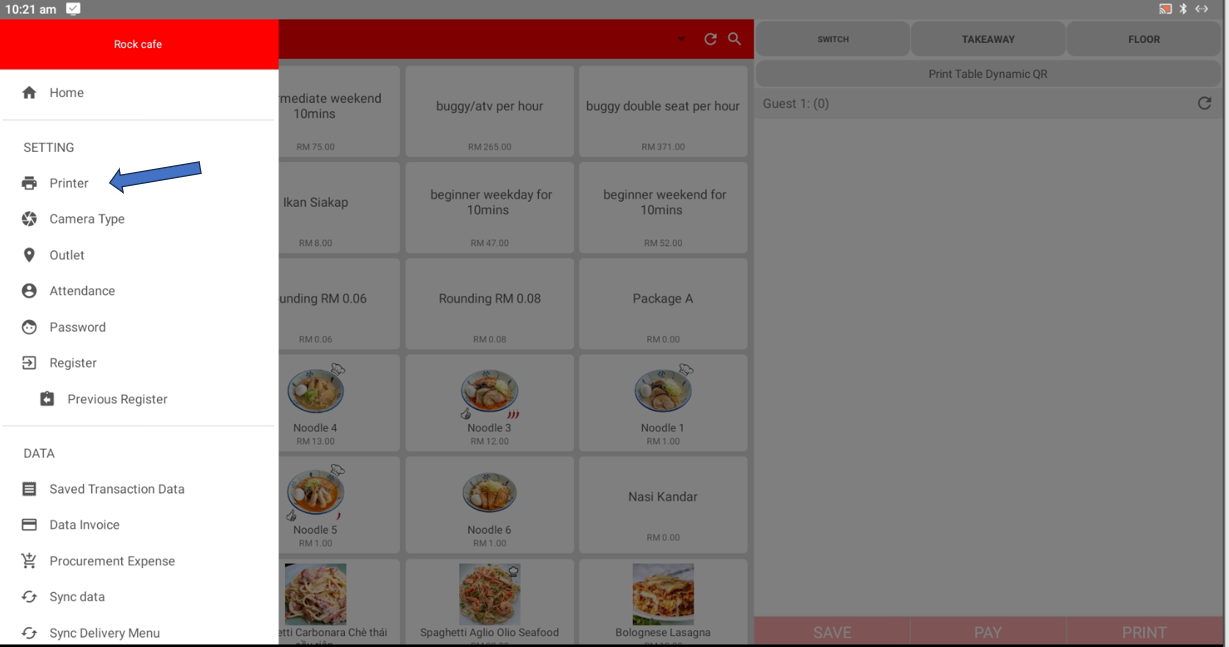
- From the menu, locate the "Printer" option under SETTINGS.
- Click on "Printer" to open the printer configuration settings.
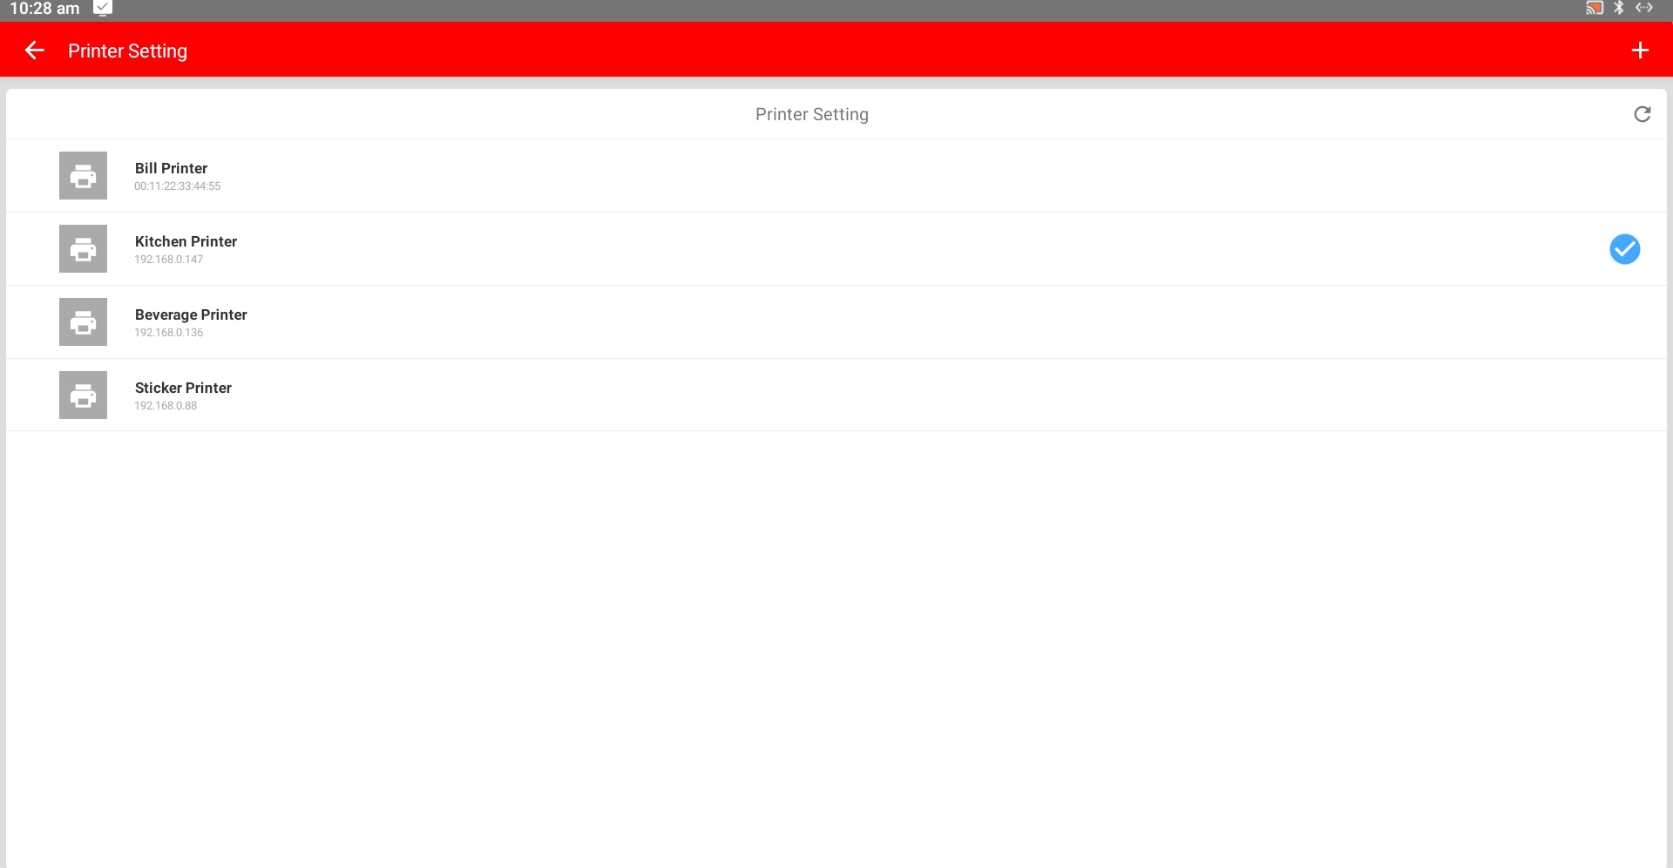
- Click on the printer you want to connect to.
- If a blue checkmark (✔) appears next to the printer, it means the printer has been successfully connected.
Still stuck?
Our team is happy to walk you through this step by step.